Overview
This guide covers Adding Automatic Cash Discounts in Chively using a consistent, support-friendly workflow.
Before you begin
- Confirm you can access the Chively Management Page or POS as needed.
- Make sure your account has permission to change these settings.
- Keep a test order, test payment, or test user available for validation.
Steps
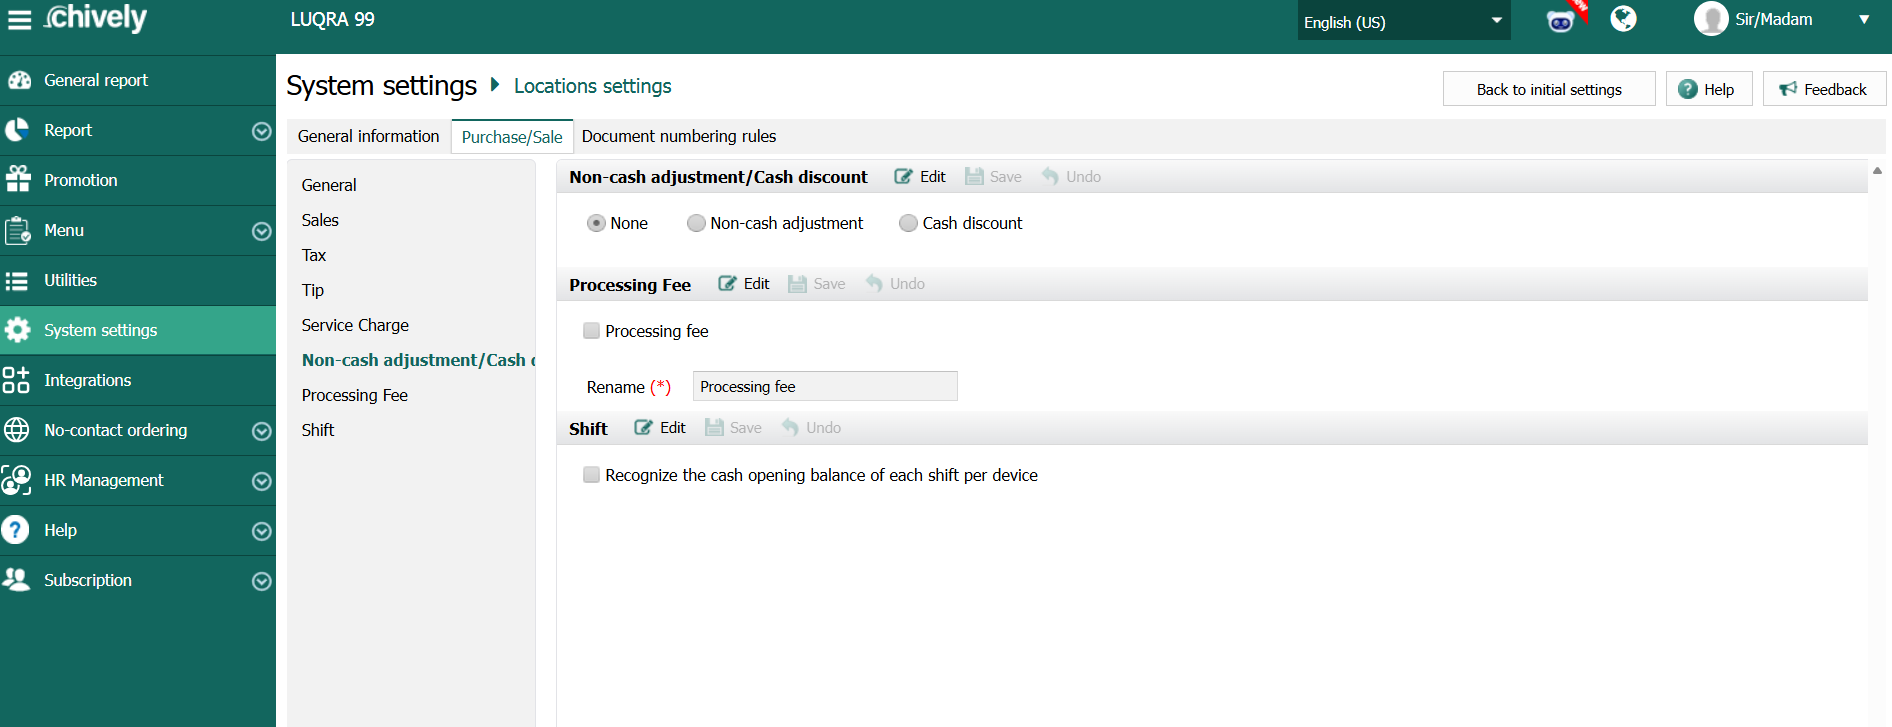
-
Go to System settings/Locations settings.
-
On the Purchase/Sale tab, click Edit in Non-cash adjustment/Cash discount. Select Cash discount, then enter the discount percentage you want to give customers for cash-only transactions.
-
Note: Restaurant managers can rename the program in the Rename box.
-
Go to Settings.
-
In the Tax & Fee tab, select Cash discount, then enter the discount percentage when customers pay in cash.
-
Note: Restaurant managers can change the program name in the Display Name box.
-
The Sales overview page will also display the total percentage of customer savings from all cash transactions.
-
You have now successfully added a set discount for all cash-only transactions in Chively!
Verification
- Confirm the change is visible in the expected Chively screen.
- Run a quick real-world test to ensure behavior is correct.
- If results are unexpected, double-check permissions and device/network status.
Need help?
For further support, reach out to your Chively sales agent.