Overview
This guide covers How To Create Your Restaurant Layout in Chively using a consistent, support-friendly workflow.
Before you begin
- Confirm you can access the Chively Management Page or POS as needed.
- Make sure your account has permission to change these settings.
- Keep a test order, test payment, or test user available for validation.
Steps
- Establish your restaurant area on the Management page.
- In the Layout Settings section on the start-up interface, select Restaurant layout settings.
- Click Edit and select Add Area, then add a name for that area. You can now drag and drop tables into the named area.
- To edit the table names, number of seats, and table type, click on the table you want to edit. Fill in the information of table name (Table name), number of seats (No. of seats), and select the table type (Table.
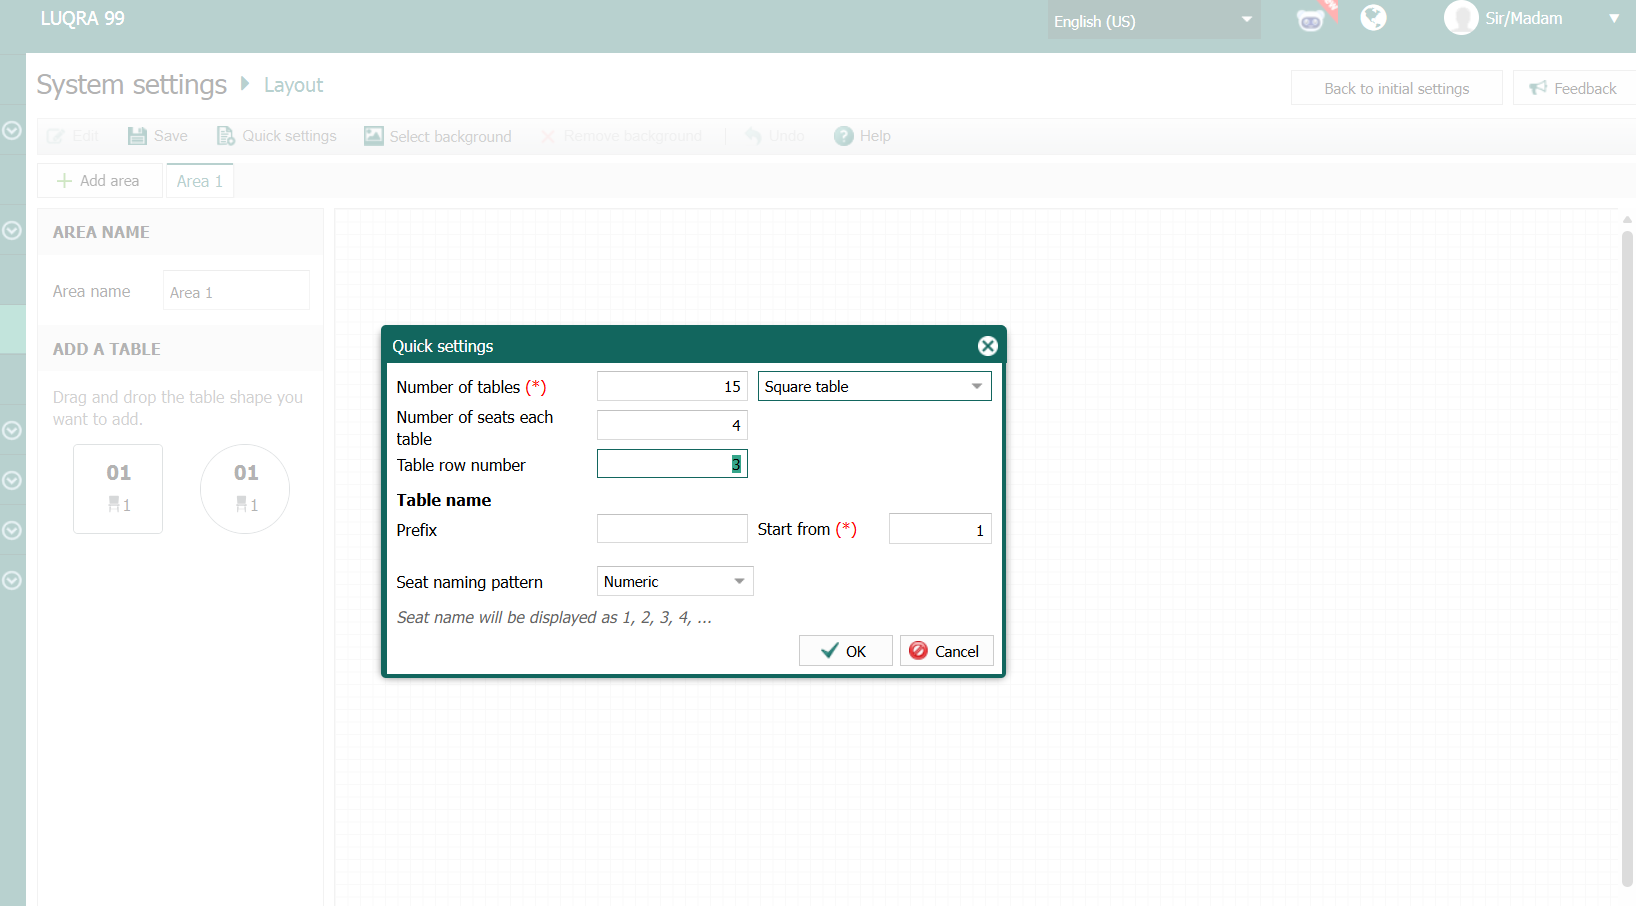
- Enter the number of tables corresponding to each area (Number of tables).
- Choose the table model (Round or Square) and the number of seats at the table.
- Fill in the table row number.
- Fill in the prefix (Prefix) and the starting number (Start from)Then, press OK.
- Method 2: Use the mouse to drag and drop table icons to change positions on the diagram.
- You can also choose a background image for the diagram by clicking "Select background" and then uploading your chosen image. If you want to remove a background image, click Remove background.
- Click the icon to edit the table layout.
- Select the area and table you want to edit, then change one of these options:.


Verification
- Confirm the change is visible in the expected Chively screen.
- Run a quick real-world test to ensure behavior is correct.
- If results are unexpected, double-check permissions and device/network status.
Need help?
For further support, reach out to your Chively sales agent.