Overview
This guide covers How to Upload Your Menu in Chively using a consistent, support-friendly workflow.
Before you begin
- Confirm you can access the Chively Management Page or POS as needed.
- Make sure your account has permission to change these settings.
- Keep a test order, test payment, or test user available for validation.
Steps
- On the start-up interface, select Add item manually.
- Click Add.
- For detailed item setup, use the relevant guides for adding dishes and combos.
- To import from Excel, in the Menu section on the start-up interface, select Import from Excel file.
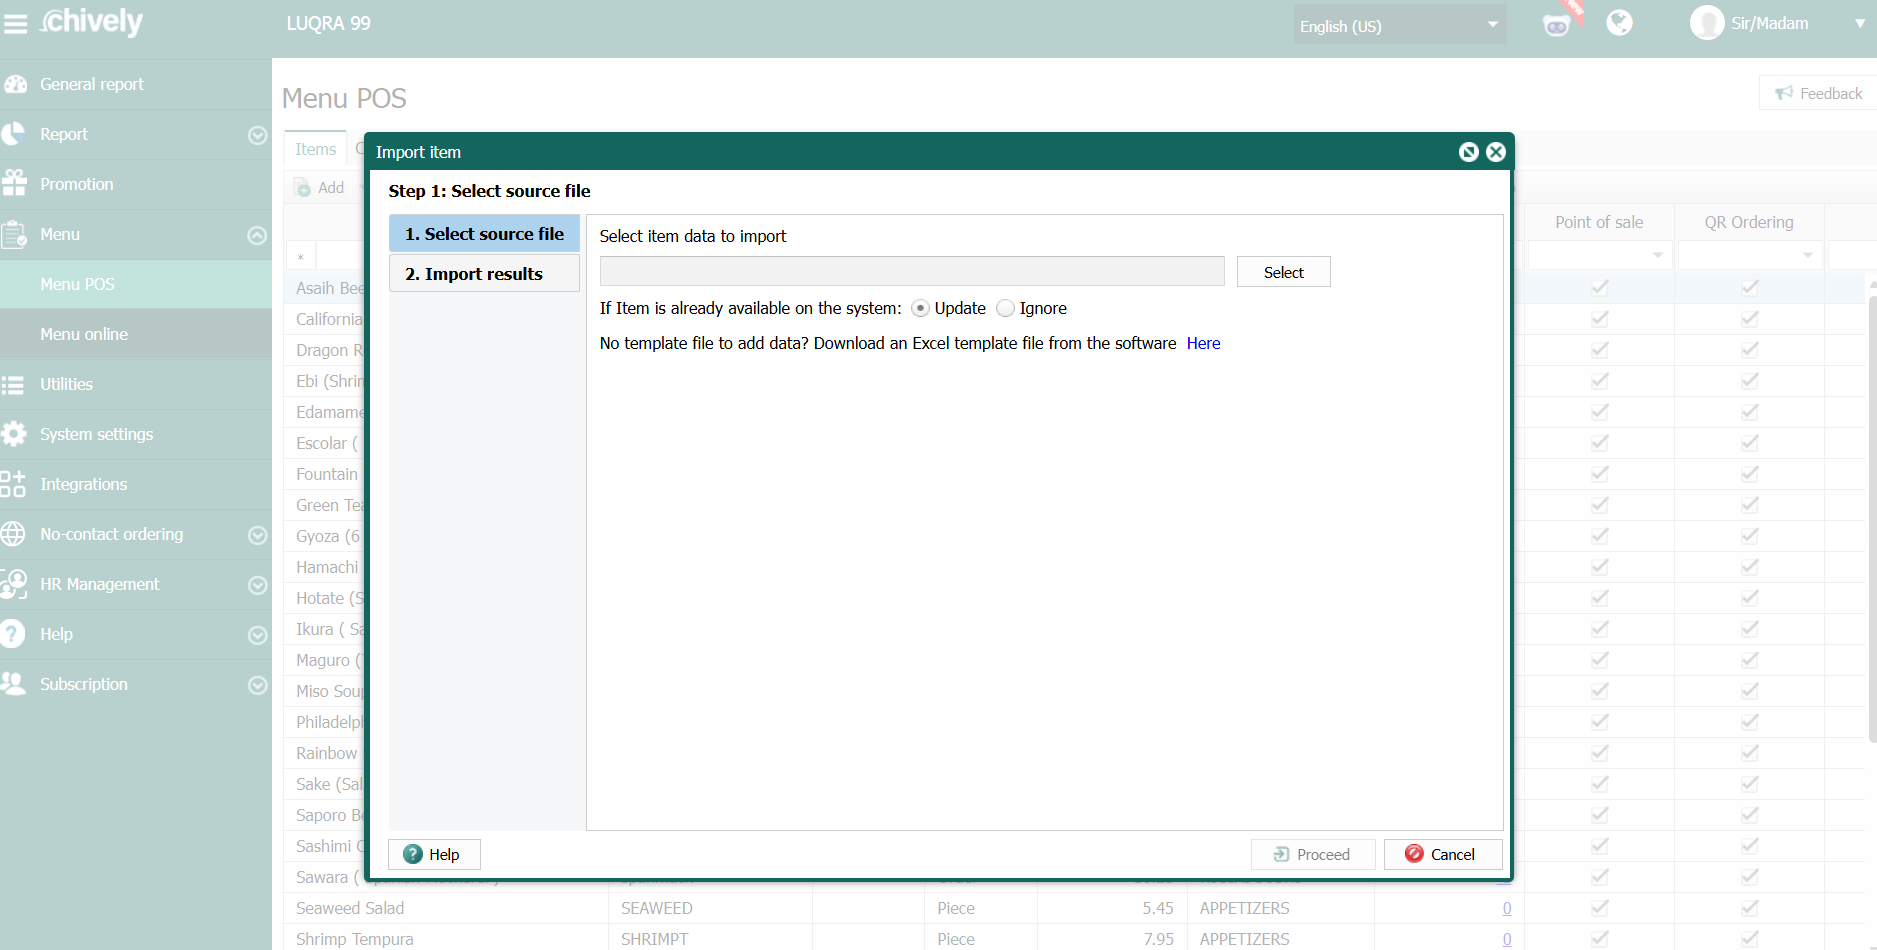
- Download the Excel menu file and, if needed, download an Excel template file.
- Copy the restaurant menu list into the downloaded Excel template.
- Save and close the Excel file.
- In the Menu Declaration section on the start-up interface, select Import from Excel.
- Upload the Excel file to Chively.
- If the Excel file includes an item code that already exists, choose one option:
- Update to replace the existing item data with the Excel file values.
- Skip to keep the existing item data and ignore that Excel row.
- Click Continue and review how many valid and invalid items were detected.
- Click Execute to import items into the system.
- Click Close after the import confirmation appears.
Verification
- Confirm the change is visible in the expected Chively screen.
- Run a quick real-world test to ensure behavior is correct.
- If results are unexpected, double-check permissions and device/network status.
Need help?
For further support, reach out to your Chively sales agent.