Overview
This guide covers How to Customize Kitchen Printouts and Invoices in Chively using a consistent, support-friendly workflow.
Before you begin
- Confirm you can access the Chively Management Page or POS as needed.
- Make sure your account has permission to change these settings.
- Keep a test order, test payment, or test user available for validation.
Steps
- On the admin page, select Loyalty.
- Click Settings/Printer Templates.
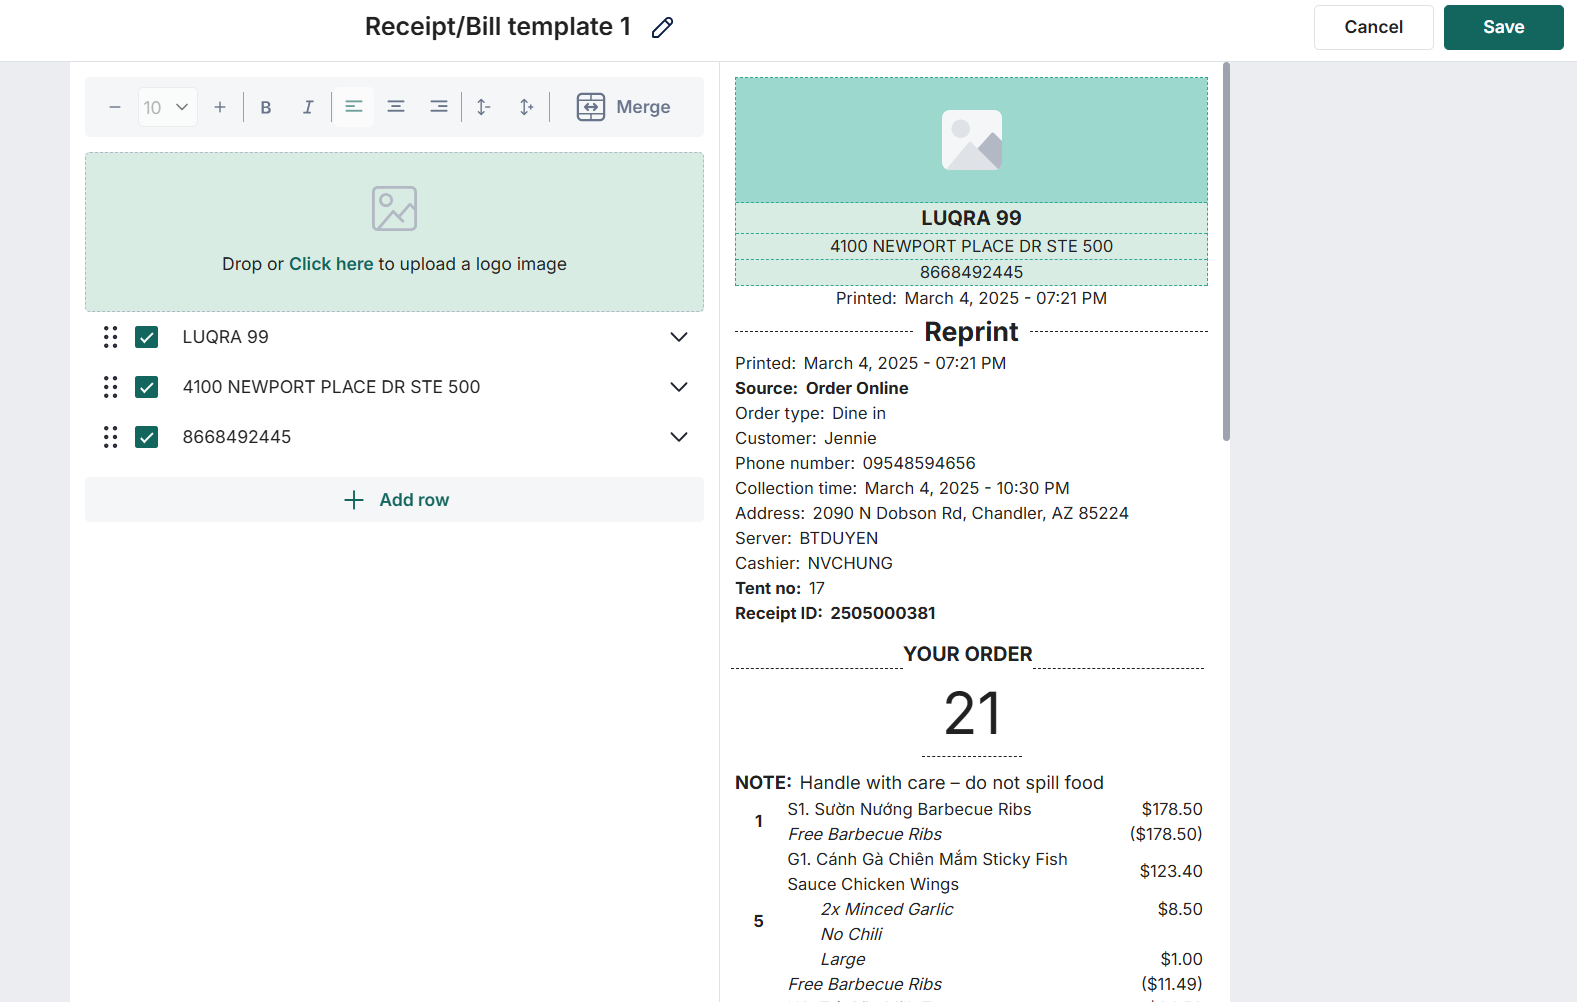
- Click Add Printer template. Then, select Receipt/Bill template and paper size.
- Click the arrow icon on Delicacy to edit the restaurant name.
- Click the arrow icon on the Washington DC placeholder address to edit your restaurant's address.
- Click the arrow icon next to TEL to edit the restaurant's phone number.
- Click Add row to add another row of restaurant information.
- Fill in the Title line and the Content line.
- Click Save to save changes.
- Note: You can uncheck any entry that you don’t want to be displayed on the template.
- Click Add printer template. Then, select Kitchen template and paper size.
Verification
- Confirm the change is visible in the expected Chively screen.
- Run a quick real-world test to ensure behavior is correct.
- If results are unexpected, double-check permissions and device/network status.
Need help?
For further support, reach out to your Chively sales agent.